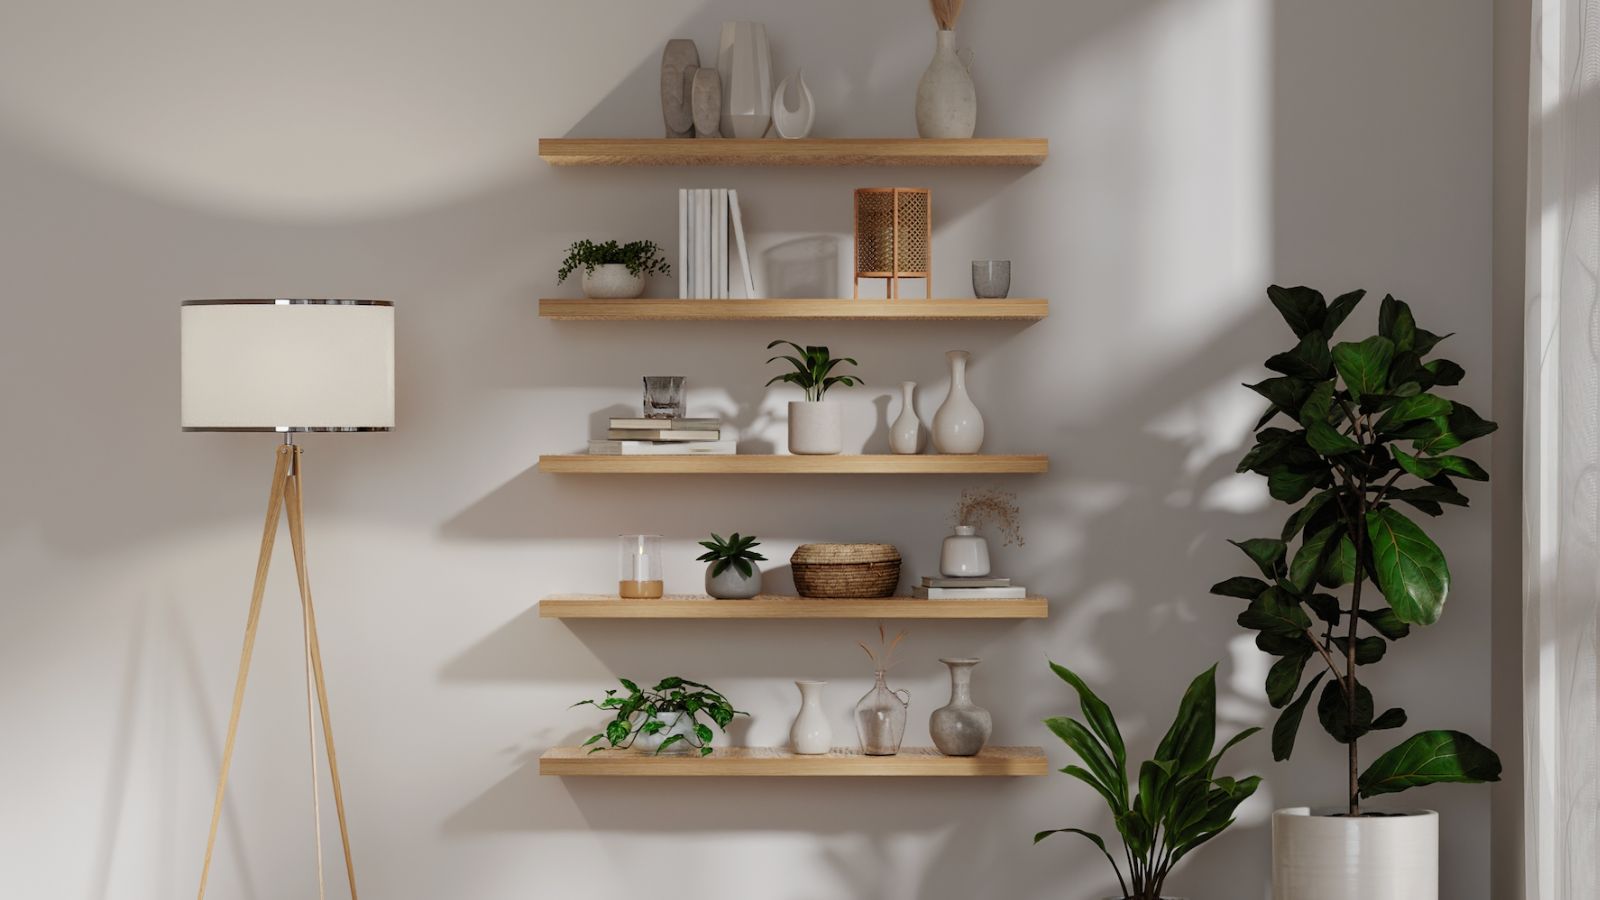
Installing floating shelves can transform your space, adding both functionality and style. To achieve a professional look, you need the right tools, accurate measurements, and a clear installation plan. This guide will walk you through each step, ensuring your shelves are mounted securely and aesthetically.
Preparing to Install
Before you start installing floating shelves, proper preparation is key. You must gather the necessary materials and tools, choose the right location, and understand the wall structures in your home. Each step contributes to a successful installation.
Gathering Materials and Tools
To install floating shelves effectively, you need specific materials and tools.
Materials:
- Floating Shelves: Choose the style and size that suits your space.
- Brackets: Ensure they are designed for the weight capacity you expect to place on the shelves.
- Wall Anchors: Use these if you’re mounting on drywall.
Tools:
- Level: To ensure your shelves are perfectly horizontal.
- Drill: For making holes without damaging your walls.
- Screwdriver: To tighten screws into the brackets and anchors.
- Stud Finder: Helpful for locating supports in the wall.
Having these materials readily available will streamline the installation process.
Selecting the Ideal Location
Choosing the right location is crucial for both aesthetics and functionality.
- Height: Think about how high you want the shelves. They should be easily accessible but not obstructive.
- Light: Consider natural light; shelves will showcase items better with good lighting.
- Space Usage: Ensure the area fits your intended purpose. Is it for books, decor, or storage?
Before you drill, visualize how the shelves will look in your selected spot. Mark your desired height with a pencil for clarity.
Understanding Wall Structures
Different wall types require different installation techniques.
- Studs: If possible, attach shelves to studs for better support. Use a stud finder to locate these.
- Drywall: If you can’t hit a stud, use wall anchors to distribute weight.
- Concrete or Brick: For these materials, you’ll need masonry screws and a drill with a masonry bit.
Being aware of your wall structure will help ensure your shelves are secure and stable.
Installation Process
The installation of floating shelves involves several critical steps. You will need to ensure proper measurements, secure drilling, and accurate placement for a professional finish.
Marking the Wall and Leveling
Begin by deciding the height and location for your shelf. Use a stud finder to locate wall studs, as these provide better support. Mark the desired position with a pencil.
Next, use a level to draw a straight line where the brackets will go. This helps ensure your shelf will sit evenly. If you’re installing multiple shelves, measure and mark the spacing consistently to maintain alignment.
Double-check your markings before proceeding. Adjust as needed to ensure accuracy, as this step is crucial for a neat appearance.
Drilling and Anchoring
With your markings in place, choose the appropriate drill bit size based on your anchor type. For standard anchors, a 3/16-inch drill bit typically works, but always check the packaging.
Drill holes at the marked points, ensuring you go straight in to avoid misalignment. For heavier shelves, it’s best to secure your brackets into wall studs.
Insert the anchors into the drilled holes. Gently tap them in with a hammer until they are flush with the wall. This step adds crucial support for your floating shelves.
Attaching the Shelf Brackets
Now it’s time to attach the brackets. Position each bracket over the wall anchors you installed, aligning them with your markings.
Use screws to secure the brackets, tightening them firmly but avoiding over-tightening which could damage the wall. A power drill or screwdriver works well for this task.
Ensure each bracket is level before fully securing it. This will keep your shelf lying flat and prevent any tipping or instability.
Placing and Securing the Shelf
Once the brackets are in place, carefully slide the floating shelf over the brackets. Ensure it sits evenly on all sides.
To secure the shelf, use any provided screws or fasteners that fit through the brackets into the shelf. This additional fastening will stabilize the shelf against any weight applied.
Perform a final check to ensure the shelf is steady and secure. Test it by gently applying pressure to confirm that it can hold the desired items without wobbling.